



DIY guideFuel tank
Find and walk around the fuel tank
Find the fuel tank, read its tag, find out who owns it, and walk round it for rust, drips and weak legs. Ask the supplier when it's next inspected.
- 10 to 20 min
- 9 steps
- Every step animated
9 steps
Tap a step to watch it again.
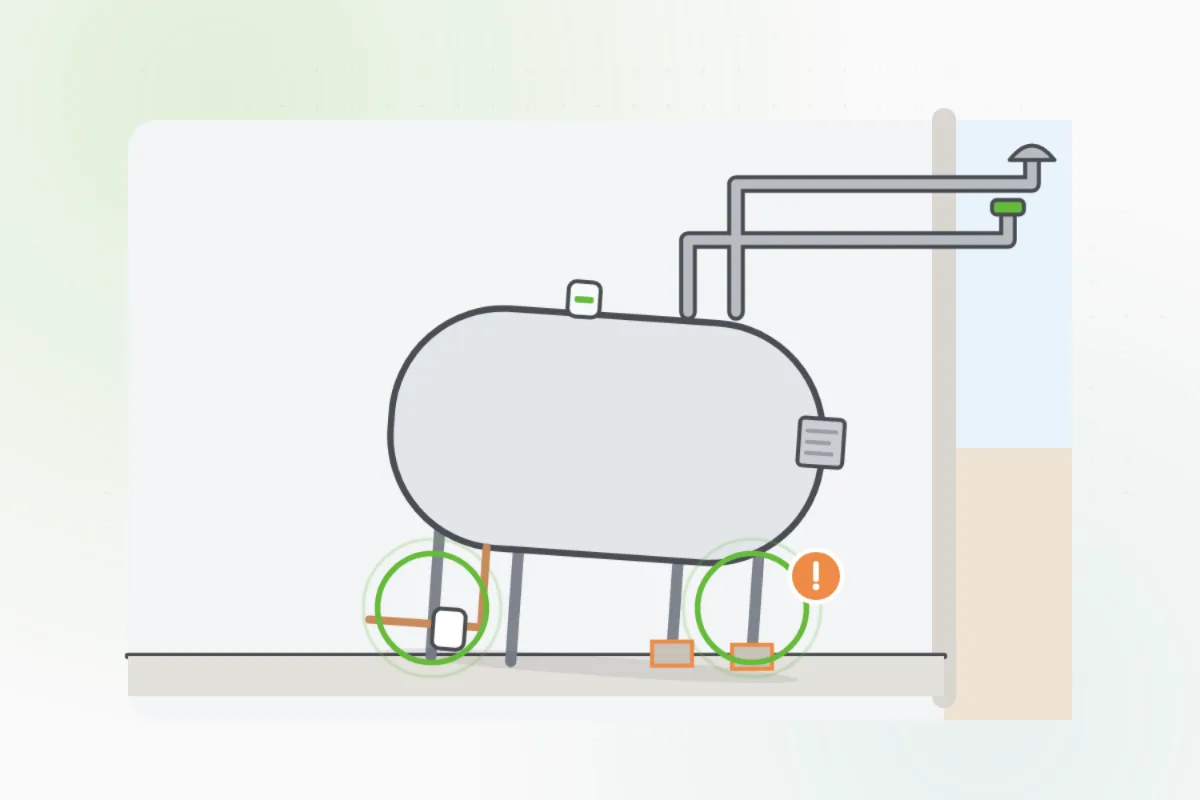
Look in the basement, the garage, or outside by the wall. A buried tank shows as a fill pipe and a vent pipe out of the ground.
Find the metal tag or sticker on the tank and photograph it. It shows when it was made and what it's built for.
Ask your fuel supplier whether you own the tank or they do. The owner looks after it.
Walk round it with a flashlight. Look for rust, bubbling paint, wet spots, or stains on the floor under it.
Its legs should stand straight on a solid floor or slab, not on blocks that tilt or sink.
Outside, the fill and vent pipes should have their caps on, with nothing blocking the vent: snow, a nest or a plant.
Keep boxes, paint and anything that burns away from it, and the path to it clear for deliveries.
Ask the supplier when it's next due to be inspected, and note what they say.
A drip, a wet stain, a strong smell, or legs that lean: call your fuel supplier now.
Smell propane? Leave, and call the supplier from outside.
What you need
- A flashlight
- A phone for photos
- Your fuel supplier's number
Call a pro if
- A drip or a wet stain under it
- A strong fuel smell
- Legs that lean or blocks that sink
- Rust that has eaten into it

Handyman says: Leaking? Call your fuel supplier.
Free for every home. Handyman asks a few questions, then books a pro it trusts.
More heating and air guides
See all 51


Rather have
a pro do it?